
Gas burner performance depends on several critical components: igniters, burner heads, gas valves, thermocouples, and control knobs. Each part supports efficient operation and safeguards users from potential hazards.
- Worn or damaged parts often reduce efficiency and can cause uneven heating.
- Regular cleaning and timely replacement of burner components lower the risk of malfunctions, including gas leaks.
- Routine inspections help detect wear early, extend appliance lifespan, and support safety compliance.
Key Takeaways
- Gas burner igniters start the flame safely and efficiently; watch for clicking sounds or weak flames as signs to replace them.
- Burner heads mix gas and air for stable flames; replace them if flames are uneven or the head shows cracks or corrosion.
- Gas valves control gas flow and pressure; leaks, noises, or irregular flame behavior signal the need for valve inspection or replacement.
- Thermocouples act as safety devices that shut off gas if the flame goes out; frequent pilot light outages or yellow flames indicate thermocouple issues.
- Control knobs regulate heat output and must fit properly; cracked or loose knobs reduce safety and should be replaced promptly.
- Regular cleaning and inspection of all parts prevent failures, improve efficiency, and extend the life of your gas burner.
- Always choose replacement parts that match your appliance’s specifications and meet safety standards for reliable performance.
- For complex parts like valves, igniters, and thermocouples, hire qualified technicians to ensure safe installation and operation.
Gas Burner Igniters
What Is a Gas Burner Igniter?
Function and Role
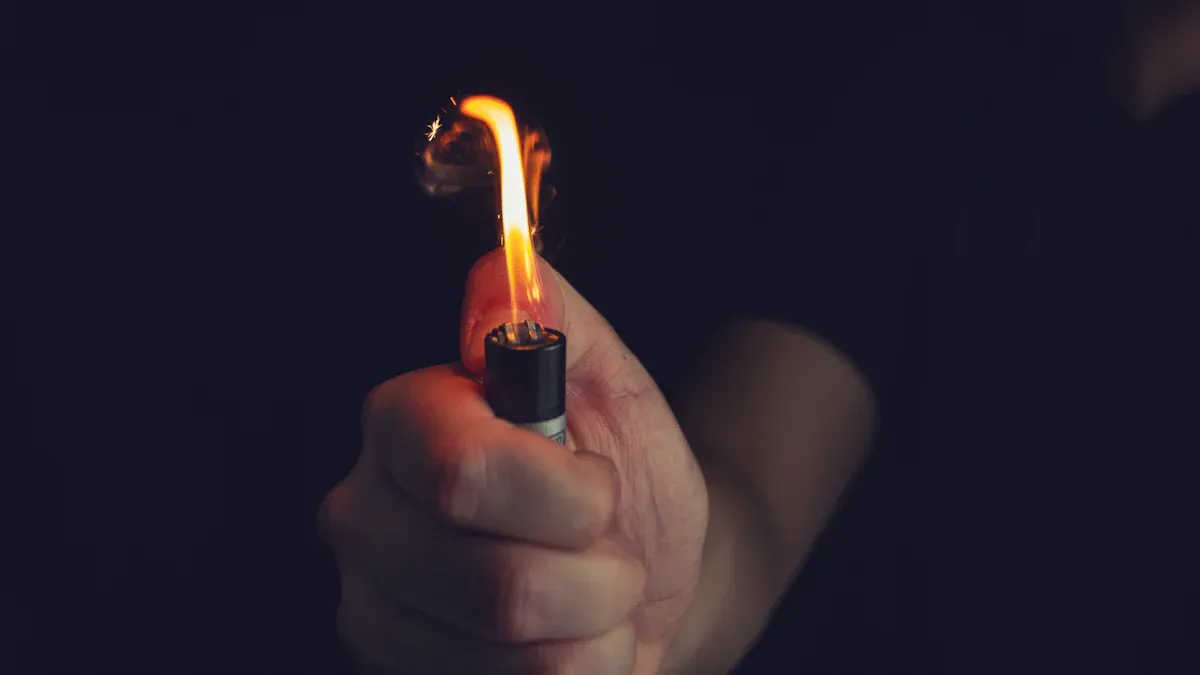
A gas burner igniter serves as the starting point for any gas appliance. This component creates the initial spark or heat needed to ignite the gas released from the burner. Without a functioning igniter, the burner cannot operate safely or efficiently. The igniter prevents gas buildup by ensuring immediate ignition, which reduces the risk of dangerous leaks and supports consistent cooking performance.
- The igniter is responsible for igniting the gas released from the burners.
- Modern igniters work by producing an electric spark or heating a surface to a temperature that ignites the gas.
- This process ensures safe operation and efficient energy use.
Types of Igniters
Several types of igniters exist in today’s gas appliances. The most common include:
- Electric igniters (spark igniters and hot surface igniters)
- Standing pilot igniters
- Electronic igniters
- Matchstick igniters
Electric igniters dominate modern gas stoves. They generate a spark or heat to ignite the gas flow at the burner, offering reliability and ease of use. Recent advancements have introduced Silicon Nitride hot surface igniters, which provide greater durability and reliability, especially in harsh environments. Plasma igniter technology is also emerging, using a high-temperature plasma arc for more efficient ignition.
Signs Your Gas Burner Igniter Needs Replacement
Common Igniter Issues
Appliance repair professionals identify several common issues that signal a failing igniter:
- Persistent clicking sounds when turning on the burner
- Delayed ignition, which can cause gas buildup
- Weak or no flame during ignition
- Visible damage, such as cracks or discoloration
Warning Signs to Watch For
Users should remain alert to these warning signs. Persistent clicking or a burner that fails to light promptly often points to a worn igniter. Any visible damage or discoloration also indicates the need for replacement. Addressing these issues quickly helps maintain safety and performance.
Tip: Regularly inspect the igniter for physical damage or performance changes to prevent unexpected failures.
How to Choose the Right Gas Burner Igniter
Compatibility and Fit
Selecting the correct igniter requires attention to several compatibility factors:
- Ignition type compatibility with the burner control system (electric spark, pilot flame, direct ignition)
- Compatibility with flame detection methods, such as UV scanners or ionization rods
- Electrical requirements of the ignition system
- Integration with building management systems or remote monitoring platforms
These criteria ensure the igniter fits the specific burner model and operates safely.
Quality and Brand Considerations
Quality and brand reputation play a significant role in igniter selection. Leading manufacturers now offer igniters with advanced features, such as safety interlocks and emergency shutoffs. The market has seen growth in pulse igniter technology, with innovations in electronic control, miniaturized designs, and IoT integration. These advancements improve performance, fuel efficiency, and emission control, making them ideal for next-generation gas burner systems.
Gas Burner Igniter Maintenance and Installation Tips
Cleaning and Care
Proper maintenance of a gas burner igniter ensures reliable performance and extends the lifespan of the appliance. Regular cleaning removes grease and debris that can interfere with ignition. Technicians recommend cleaning the igniter electrode monthly or after periods of heavy use. This practice helps maintain a consistent spark and prevents buildup that could block ignition.
A maintenance routine should include the following steps:
- Remove grease and debris from the igniter electrode using a soft brush or cloth.
- Inspect burner holes for blockages and clear them to support proper gas flow.
- Check wiring connections and tighten any loose components to avoid electrical issues.
- Replace any worn or damaged igniter parts immediately.
- Confirm that the igniter sits correctly near the burner for optimal spark delivery.
- For battery-operated igniters, replace batteries regularly with the manufacturer-recommended type.
- Protect the igniter from moisture by storing the appliance in a dry location and using weather-resistant covers.
- After each use, wipe down igniters and burners to remove moisture and prevent rust.
- Apply heat-resistant lubricants to metal parts to reduce the risk of corrosion.
- Before storing the appliance for an extended period, clean the grill, disconnect the gas supply, and cover both igniters and burners.
Tip: Consistent maintenance not only improves performance but also reduces the risk of unexpected failures.
Step-by-Step Replacement Guide
Replacing a gas burner igniter requires careful attention to detail. The following guide outlines the essential steps for a safe and effective replacement:
- Disconnect the appliance from the gas supply and unplug it from any electrical source.
- Allow the burner to cool completely before starting the replacement process.
- Locate the igniter by removing the burner grates and any protective covers.
- Detach the old igniter by loosening screws or clips that hold it in place.
- Disconnect the wiring from the old igniter, noting the configuration for reassembly.
- Attach the new igniter, ensuring it aligns properly with the burner.
- Reconnect the wiring, matching the original setup.
- Secure the new igniter with screws or clips.
- Replace any covers and burner grates.
- Reconnect the appliance to the gas and electrical supply, then test the igniter for proper operation.
Note: Always consult the manufacturer’s manual for model-specific instructions and safety precautions.
Routine care and correct installation techniques help maintain the safety and efficiency of any gas burner system.
Gas Burner Heads
What Is a Gas Burner Head?
Role in Gas Distribution
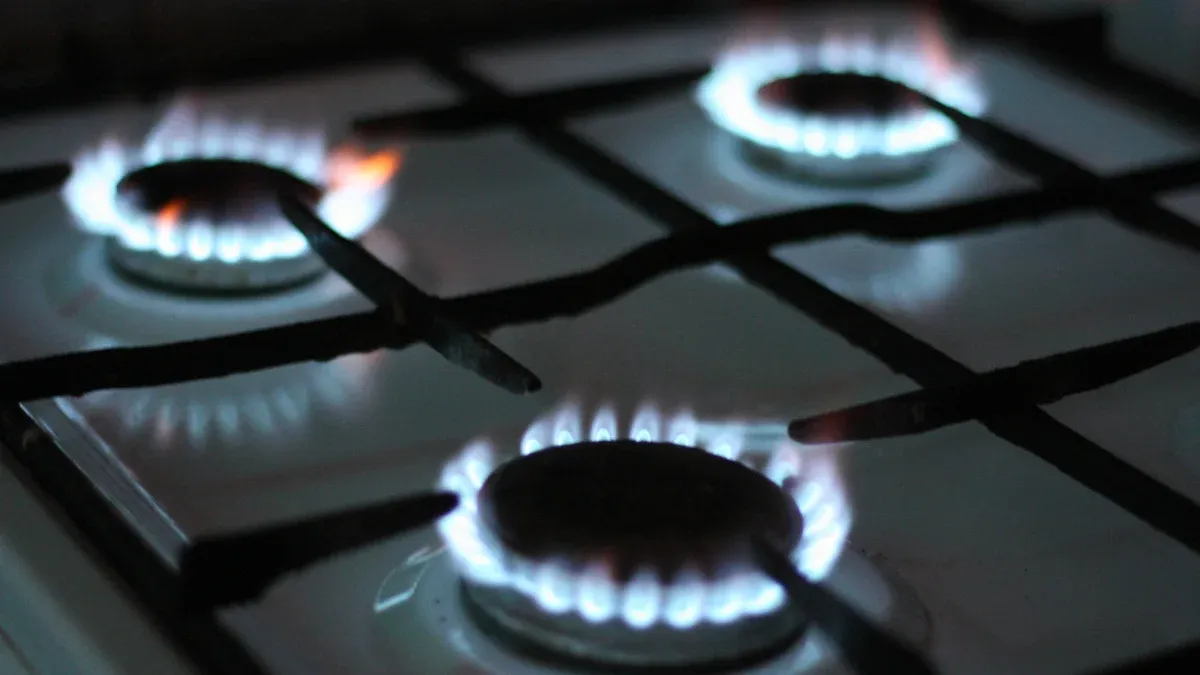
The gas burner head plays a central role in distributing fuel and air within the burner system. It generates turbulent airflow with vortices, which enhances the mixing of fuel and air. This improved mixing leads to stable flames and efficient combustion. Proper design elements, such as nozzle positioning and the use of diffusers or swirlers, help create a homogeneous fuel-air mixture. This process prevents fuel-rich zones and high-temperature areas that can produce pollutants like nitrogen oxides and carbon monoxide. The combustion head, therefore, becomes essential for reducing emissions, stabilizing the flame, and optimizing overall burner performance.
Materials and Designs
Manufacturers use a variety of materials for burner heads, including cast iron, brass, and stainless steel. Each material offers unique benefits. Cast iron provides durability and excellent heat retention. Brass resists corrosion and delivers precise flame control. Stainless steel stands out for its resistance to rust and ease of cleaning. Designs vary from simple round heads to advanced multi-port configurations. Some modern burner heads feature removable caps or modular components, making maintenance easier and improving longevity.
Signs Your Gas Burner Head Needs Replacement
Performance Problems
A decline in burner performance often signals the need for replacement. Users may notice uneven flames, weak heat output, or difficulty igniting the burner. These issues can result from clogged ports, warping, or internal blockages. Over time, even regular cleaning may not restore full function if the head has deteriorated.
Visual Damage Indicators
Visual inspection provides clear clues about the condition of a burner head. Look for cracks, corrosion, or discoloration. Warped or misshapen heads can disrupt gas flow and flame quality. If the burner head shows significant wear or damage, replacement becomes necessary to maintain safe and efficient operation.
Tip: Gas burner heads typically last 10 to 15 years with proper care. Regular cleaning and gentle handling can extend their lifespan by several years.
How to Select the Right Gas Burner Head
Size and Fit
Selecting the correct burner head requires attention to size and fit. The head must match the appliance’s specifications for diameter, port arrangement, and mounting style. Application scope also matters. Domestic, commercial, and industrial burners each have unique requirements for heat capacity and burner size. Matching the burner head to the intended use ensures optimal performance and safety.
Material Durability
Material durability directly affects the longevity and reliability of a burner head. Heat- and corrosion-resistant materials, such as stainless steel or brass, withstand high temperatures and frequent cleaning. When choosing a replacement, consider factors like fuel type compatibility, heat output, and safety features. Look for heads that comply with safety standards and offer easy maintenance. Regular inspection and cleaning help maintain efficiency and reduce downtime.
When selecting a gas burner head, evaluate fuel type, heat capacity, operation type, application, safety standards, and ease of installation. These factors ensure the burner head meets both performance and safety requirements.
Gas Burner Head Maintenance and Installation Tips
Cleaning Techniques
Proper cleaning of burner heads ensures efficient operation and extends the life of any gas burner. Daily cleaning routines remove spilled food and grease, which prevents corrosion and buildup. This simple habit keeps burner ports clear and supports even flame distribution. Before scrubbing, technicians recommend vacuuming around the burner heads. This step removes loose debris and reduces the risk of scratching metal surfaces.
- Use a soft brush or non-abrasive sponge to clean the burner head.
- Avoid harsh chemicals that can damage metal finishes.
- Soak removable parts in warm, soapy water to loosen stubborn residue.
- Dry all components thoroughly before reassembly to prevent rust.
Regular inspection around and under the stove helps catch hidden buildup. Moving the appliance, when possible, allows for a more thorough cleaning. Kitchen staff should receive training on proper cleaning methods and how to recognize early signs of burner problems, such as uneven flames or unusual odors.
Tip: Maintain proper kitchen ventilation with effective hoods and exhaust fans. This practice removes heat, smoke, and grease particles, supporting both performance and safety.
Safe Replacement Steps
Replacing a burner head requires careful attention to safety and proper installation techniques. Qualified professionals should handle gas connections and installations to prevent leaks and ensure compliance with safety standards. The following steps outline a safe replacement process:
- Turn off the gas supply and disconnect the appliance from any power source.
- Allow the burner to cool completely before starting work.
- Remove grates and any covers to access the burner head.
- Gently lift or unscrew the old burner head, taking care not to damage surrounding components.
- Clean the area beneath the burner head to remove debris or grease.
- Install the new burner head, ensuring it fits securely and aligns with the gas ports.
- Reassemble grates and covers.
- Reconnect the gas supply and power, then test the burner for proper flame and operation.
Standardized parts make repairs and replacements faster, minimizing downtime in busy kitchens. Modern gas burners often feature safety enhancements, such as pilotless ignition and automatic re-ignition, which improve reliability and reduce risks. If users notice gas smells, irregular flames, or malfunctioning safety controls, they should contact a professional technician immediately.
Note: Schedule regular professional maintenance to inspect burner adjustments, connections, and safety controls. Early detection of minor issues prevents costly repairs and supports long-term appliance health.
Gas Burner Valves
What Is a Gas Burner Valve?
Function in Gas Flow Control
A gas burner valve plays a vital role in regulating the flow of gas to the burner and pilot light. The valve opens and closes to control both the amount and pressure of gas entering the burner. This process ensures that gas flows only when safe and necessary. Electromagnets and safety devices, such as thermocouples, work together to prevent gas buildup by shutting off the valve if the pilot light is not lit. The valve responds to the thermostat’s demand for heat, adjusting gas flow to maintain the desired temperature. This precise control supports both safety and efficiency in any gas burner system.
Types of Gas Valves
Manufacturers offer several types of gas valves for residential and commercial applications. Manual valves require users to open or close them by hand. Automatic valves use electrical signals or thermostats to operate. Safety shutoff valves include features that stop gas flow during emergencies. Solenoid valves use electromagnetic coils for rapid opening and closing. Each type serves a specific purpose, and selection depends on the burner’s design and safety requirements.
Signs Your Gas Burner Valve Needs Replacement
Leaks and Malfunctions
Gas burner valves can develop faults over time. Safety organizations identify several common symptoms of valve failure:
| Symptom of Valve Failure | Description and Cause |
|---|---|
| Valve flap doesn’t return to normal | Spring bending, incorrect installation, or flap jamming. Inspection and replacement needed. |
| Valve leakage | Debris, damage, or spring issues cause leaks. Cleaning, repair, or replacement required. |
| Valve doesn’t open at specified pressure | Inaccurate pressure setting or stuck flap. Readjustment and regular testing necessary. |
| Exhaust released but pressure rises | Small exhaust capacity or misalignment. Valve replacement or reassembly recommended. |
| Frequent jumping or vibration of flap | Overly stiff spring or improper adjustment. Spring replacement or readjustment needed. |
| Valve opens below specified pressure | Aging springs or inaccurate settings. Tightening or spring replacement required. |
Technicians also watch for burned spots on equipment, process instability, dark smoke from stacks, and unusual noises. These signs often indicate valve or burner issues that require immediate attention.
Safety Concerns
Valve malfunctions can create serious safety risks. Leaks may lead to gas accumulation, increasing the risk of fire or explosion. Unstable burner operation, such as noisy flames or irregular pressure, signals that the valve may not regulate gas flow correctly. Safety professionals recommend prompt inspection and replacement of faulty valves to prevent hazardous situations.
Tip: If users notice any unusual odors, sounds, or performance issues, they should turn off the gas supply and contact a qualified technician immediately.
Choosing the Right Gas Burner Valve
Compatibility with Your Gas Burner
Selecting the correct valve requires careful consideration of compatibility. The valve must match the burner’s size, pressure requirements, and connection type. Material choice also affects durability. For example, carbon steel valves offer strength and cost-effectiveness but may not suit corrosive environments. Stainless steel, especially grades 304 and 316, provides excellent corrosion resistance and durability, making it ideal for harsh or high-temperature conditions. Manufacturers often use forging processes to enhance valve strength and reliability.
Safety Certifications
Homeowners and facility managers should verify that any replacement valve meets recognized safety standards. Key certifications include:
- Factory Mutual (FM) Global Class 7400 for automatic gas safety shutoff valves.
- Canadian Standards Association (CSA) Z21.21/CSA 6.5 for automated gas appliance valves.
- Canadian Gas Association (CGA) 3.9-M94 for safety shutoff valves.
- National Fire Protection Association (NFPA) standards such as NFPA 85, 86, and 87.
- Proof-of-closure switches, visible valve position indicators, and fail-safe operation features.
- Reliable operation over many cycles and fire exposure test compliance.
- Prevention of tampering and operation within specified temperature ranges.
Buyers should look for certification marks like CSA or UL on the valve and avoid suspiciously low-priced or poorly packaged products. Purchasing from trusted retailers helps ensure product authenticity and safety.
Gas Burner Valve Maintenance and Installation Tips
Inspection and Testing
Regular inspection and testing of gas burner valves help maintain safety and performance. Technicians follow a systematic approach to identify leaks, wear, and operational issues. They use a calibrated gas leak detection device designed for the specific gas type. This device checks for leaks at all connection points and valve bodies. If a leak appears, the technician immediately shuts off the gas supply and evacuates the area to prevent hazards.
A thorough inspection involves several key steps:
- Use a gas leak detector to check all valve joints and connections.
- Shut off the gas supply and evacuate if any leak is detected.
- Open and close the valve to confirm the handwheel and shut-off mechanism operate smoothly.
- Listen for unusual noises or rattling, which may signal internal damage.
- Check the tightness of all valve connections, tightening them with a wrench if needed.
- Examine valve components for signs of corrosion, wear, or damage.
- Lubricate moving parts, such as the handwheel and stem, to ensure smooth operation.
- Record all inspection results, servicing dates, and maintenance actions in a logbook.
- Ensure only qualified personnel with proper training perform inspections and servicing.
- Schedule annual servicing to maintain valve integrity and comply with safety regulations.
Technicians also inspect specific areas of the valve system. The table below summarizes key inspection points and recommended maintenance actions:
| Inspection Area | Key Procedures and Checks | Maintenance Actions |
|---|---|---|
| Flanges, Gaskets, Fasteners | Visual inspection for cracks, rust, missing or broken fasteners; ultrasonic or surface testing for defects. | Replace worn or damaged gaskets; tighten bolts in correct sequence. |
| Valve Discs, Seats, Seals | Inspect for wear, erosion, corrosion; monitor valve performance; inspect during shutdowns or via condition monitoring. | Replace worn or fatigued internal components; select media-compatible materials. |
| Valve Stem and Actuators | Check for corrosion, wear, loose connections, and proper actuator mounting; inspect electrical and hydraulic parts. | Lubricate moving parts; ensure correct actuator sizing and installation; repair or replace damaged components. |
Tip: Maintaining a detailed logbook of inspections and repairs helps track the condition of each gas burner valve and supports compliance with safety standards.
Replacement Procedures
When inspection reveals significant wear, corrosion, or malfunction, technicians must replace the gas burner valve. They follow a strict procedure to ensure safety and proper installation. First, they turn off the gas supply and disconnect the appliance from any power source. The technician allows the system to cool before starting work.
The replacement process includes these steps:
- Remove any covers or panels to access the valve.
- Loosen and disconnect the valve from the gas line, using appropriate tools.
- Inspect the connecting pipes and fittings for debris or damage.
- Install the new valve, ensuring it matches the original specifications and fits securely.
- Tighten all connections, following the manufacturer’s recommended torque sequence.
- Reconnect any electrical or actuator components, if present.
- Restore the gas supply and check for leaks using a gas leak detector.
- Test the valve by opening and closing it several times to confirm smooth operation.
- Record the replacement in the maintenance logbook.
Qualified professionals should always handle gas valve replacement. Proper installation prevents leaks and ensures the gas burner operates safely and efficiently. Regular maintenance and timely replacement of faulty valves protect both users and property.
Gas Burner Thermocouples
What Is a Gas Burner Thermocouple?
Role in Safety Shut-Off
A gas burner thermocouple acts as a critical safety device in many appliances. This component monitors the presence of a flame at the pilot light. When the flame burns steadily, the thermocouple generates a small electric current. This current keeps the gas valve open, allowing gas to flow safely to the burner. If the flame goes out, the thermocouple cools and stops producing current. The gas valve then closes automatically, preventing unburned gas from leaking into the environment. This safety mechanism protects users from potential hazards, such as gas buildup and accidental ignition.
How It Works
The thermocouple operates using the Seebeck effect. Two different metals join at one end and produce a voltage when heated by the pilot flame. This voltage signals the gas valve to remain open. If the flame extinguishes, the metals cool, the voltage drops, and the valve shuts off the gas supply. This process ensures that gas only flows when a flame is present, making the thermocouple an essential part of any gas burner safety system. Many household appliances, including stoves and water heaters, rely on this technology for safe operation.
Signs Your Gas Burner Thermocouple Needs Replacement
Burner Won’t Stay Lit
Technicians often find that a faulty thermocouple causes the burner or pilot light to go out repeatedly. When the thermocouple fails to sense the flame, it shuts off the gas supply as a safety measure. Users may notice that the pilot light will not stay lit, even after several attempts to relight it. This issue often points to a worn or damaged thermocouple.
Inconsistent Performance
Other signs of thermocouple failure include inconsistent burner performance and difficulty lighting the appliance. Visual inspection may reveal soot buildup, corrosion, or bent tips. Loose connections at the gas valve can also cause problems. Sometimes, the flame appears yellow instead of blue, indicating incomplete combustion and possible thermocouple issues. Technicians use a multimeter to check voltage output; low readings suggest the need for replacement. Most thermocouples last between two and ten years, so older units are more likely to fail.
Tip: Regularly inspect the thermocouple for visible wear, corrosion, or damage. Early detection helps prevent unexpected shutdowns and safety risks.
Selecting the Right Gas Burner Thermocouple
Length and Connector Types
Selecting a replacement thermocouple requires careful attention to length and connector type. The thermocouple must fit the specific appliance and reach the pilot flame without excess slack or tension. Connector types vary, so users should match the new thermocouple to the existing mounting and gas valve connections. Proper fit ensures accurate flame detection and reliable operation.
Universal vs. OEM Parts
Buyers can choose between universal thermocouples and original equipment manufacturer (OEM) parts. Universal models offer flexibility and fit many appliances, making them a convenient option for quick repairs. OEM thermocouples match the exact specifications of the original part, providing guaranteed compatibility and performance. When selecting a thermocouple, consider factors such as temperature range, chemical resistance, and environmental durability. Assess the application for vibration, humidity, and mechanical stress. Choose the appropriate junction type—grounded, ungrounded, or exposed—based on response time and electrical noise requirements. Always verify that the thermocouple meets industry standards for safety and reliability.
Note: Proper selection and installation of a thermocouple help maintain safe and efficient gas burner operation.
Gas Burner Thermocouple Maintenance and Installation Tips
Cleaning and Testing
Routine maintenance of a thermocouple ensures reliable operation and extends the lifespan of any gas burner. Technicians recommend regular cleaning to remove soot, carbon buildup, and debris. These deposits can interfere with the thermocouple’s ability to sense the pilot flame, leading to inconsistent performance or sudden shutdowns. Cleaning should use a gentle abrasive, such as fine steel wool or a soft brush, to avoid damaging protective coatings.
- Always turn off the appliance and disconnect it from power before starting maintenance.
- Allow the thermocouple to cool completely.
- Gently wipe the thermocouple with a soft, dry cloth to remove loose dirt.
- Use a gentle abrasive to clean stubborn soot or carbon, taking care not to scratch the metal surface.
- Inspect the thermocouple for signs of corrosion, bending, or wear.
Testing the thermocouple helps confirm its condition. A technician can use a multimeter to measure voltage output. A healthy thermocouple typically produces a small voltage when heated by the pilot flame. If the reading falls below the manufacturer’s recommended range, replacement becomes necessary.
Tip: Keep a record of maintenance dates and test results. This practice supports continuous safe operation and helps identify when replacement is due.
Maintaining a stock of spare thermocouples that meet manufacturer specifications reduces downtime and ensures quick repairs. Since thermocouples degrade over time due to heat and chemical exposure, timely replacement is essential for safety.
Installation Steps
Proper installation of a thermocouple is critical for the safe and efficient operation of a gas burner. The following steps outline best practices for installation:
- Turn off the appliance and disconnect it from any power source. Wear safety goggles and gloves for protection.
- Locate the thermocouple near the burner or pilot light assembly. Consult the user manual if needed.
- Carefully remove the old thermocouple using the correct tools. Avoid damaging nearby components.
- Position the new thermocouple in the same location as the old one. Secure it firmly, but do not overtighten.
- Reconnect any wires or fittings according to the manufacturer’s instructions.
- Reassemble any parts that were removed during the process.
- Turn on the gas supply and ignite the pilot light. Hold the pilot button until the flame remains steady.
- Test the new thermocouple by observing if the burner stays lit and operates smoothly.
Note: Only qualified personnel should perform installation and maintenance on gas appliances. This approach ensures compliance with safety standards and reduces the risk of accidents.
Regular inspection, cleaning, and correct installation of thermocouples keep gas burners operating safely and efficiently. These practices protect users and help maintain appliance reliability.
Gas Burner Control Knobs
What Are Gas Burner Control Knobs?
Function and Importance
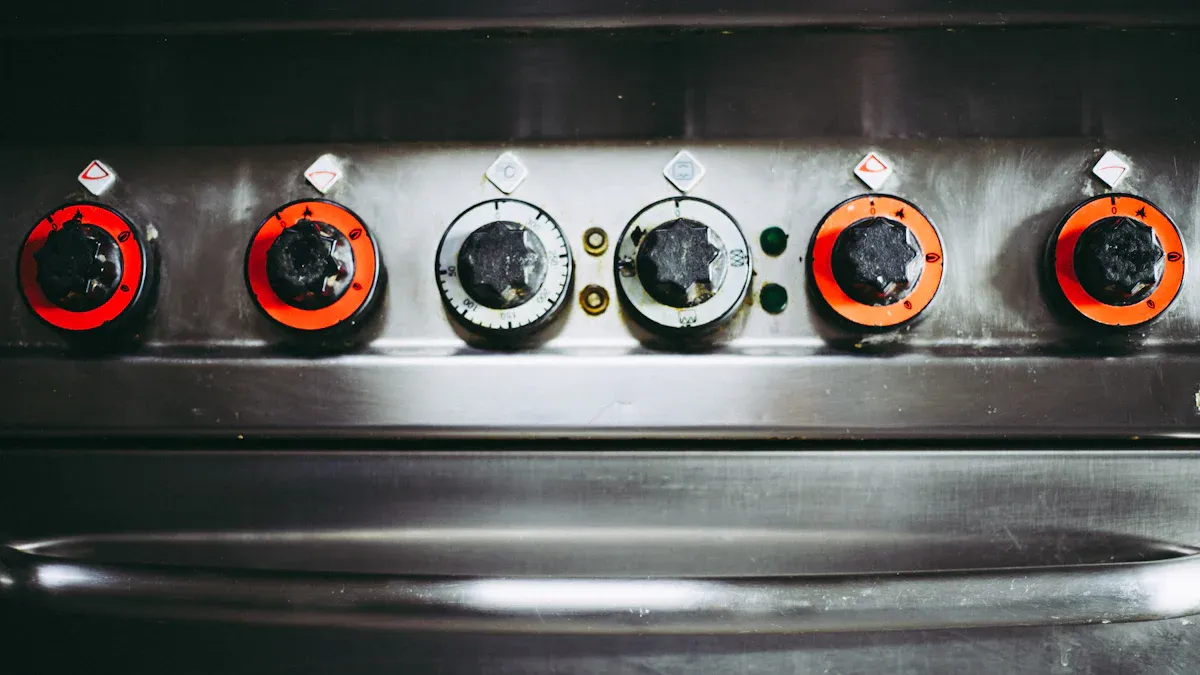
Gas burner control knobs serve as the primary interface between the user and the appliance. These knobs regulate the flow of gas to each burner, allowing precise adjustment of heat output and flame intensity. Users rely on these controls for everything from simmering sauces to boiling water. Safety features, such as push-and-turn mechanisms and integrated flame failure devices, help prevent accidental gas leaks and burns. Many manufacturers recommend using safety knobs or knob covers, especially in homes with children or pets, to reduce the risk of unintended ignition. Regular cleaning and inspection of control knobs ensure safe and efficient operation. Replacing worn or damaged knobs restores full control and maintains the safety of the gas burner.
Common Materials
Manufacturers use a variety of materials for control knobs. Aluminum remains a popular choice for both top-side and front-side placements, offering a minimalist look and a soft-touch surface. Aluminum knobs provide a silky feel and optimal grip, making them suitable for both residential and professional kitchens. Some high-end models use heavy brass or black brass for a refined, stylish appearance. For outdoor or DIY applications, PETG plastic has gained popularity due to its durability, UV resistance, and weatherproof qualities. Many of these plastic knobs are 3D printed and recyclable, making them ideal for outdoor play kitchens or mud kitchen builds.
Signs Your Gas Burner Control Knobs Need Replacement
Cracks and Wear
Over time, control knobs can show visible signs of wear. Users often notice cracks, chips, or discoloration, especially after repeated exposure to heat. Physical damage may result from low-quality plastic or prolonged use. Knobs that become uncomfortably hot may indicate heat escaping from worn oven door seals or poor ventilation. Damaged knobs compromise both safety and functionality, making timely replacement essential.
Difficulty Turning or Slipping
Several operational issues signal the need for new control knobs:
- Knobs become loose, making it difficult to control the burner securely.
- Sticking or resistance when turning, often caused by dirt or debris buildup around the base.
- Knobs fail to turn burners on or off properly, sometimes due to malfunctioning control valves.
- Safety mechanisms, such as push-and-turn features, stop working as intended.
Persistent problems after cleaning and tightening suggest that replacement is necessary to maintain safe and reliable operation.
Tip: If a knob feels loose or sticks even after cleaning, consider replacing both the knob and the underlying valve for optimal performance.
How to Choose the Right Gas Burner Control Knobs
Fit and Compatibility
Selecting the correct control knob requires attention to fit and compatibility. The knob must match the shaft size and shape of the gas burner’s control valve. Manufacturers often provide model-specific knobs, but universal options are available for many appliances. Proper fit ensures smooth operation and prevents accidental slippage during use.
Style and Durability
Style and durability play a significant role in the selection process. The table below highlights popular styles and materials for 2025:
| Style/Placement | Material | Design Features |
|---|---|---|
| Top Side (on countertop) | Aluminum | Minimalist, soft-touch, silky feel |
| Front Side (vertical panel) | Aluminum | Refined design, optimal grip, space-saving |
| Outdoor/DIY | PETG Plastic | UV/weather-resistant, recyclable, 3D printed |
Aluminum and brass knobs offer a premium look and long-lasting performance. PETG plastic knobs provide excellent resistance to outdoor conditions. Users should choose a style that matches their kitchen’s design and meets their durability needs.
Note: Replacing old or damaged knobs with high-quality, compatible options improves both safety and user experience.
Gas Burner Control Knob Maintenance and Installation Tips
Cleaning and Care
Proper maintenance of control knobs ensures smooth operation and extends the life of any gas burner. Regular cleaning prevents grime and grease from building up around the knobs. This buildup can cause sticking or slipping, which affects temperature control. Technicians recommend removing the knobs periodically for a thorough cleaning. Use a soft cloth or sponge with mild soap and warm water. Avoid abrasive cleaners, as they can scratch the surface or remove markings.
After cleaning, dry the knobs completely before reinstalling them. Moisture left behind can lead to corrosion or electrical issues. Inspect each knob for cracks or signs of wear during cleaning. Replace any knob that shows damage to maintain safe operation. For best results, clean the area around the control shaft as well. Dirt and debris in this area can interfere with the knob’s movement.
Tip: Schedule a monthly cleaning routine for all control knobs, especially in busy kitchens. This habit keeps the gas burner functioning reliably and reduces the risk of malfunction.
Easy Replacement Guide
Replacing a faulty control knob on a gas burner is a straightforward process. Anyone can follow these steps to ensure proper installation and safety:
- Unplug the appliance before starting any maintenance or replacement. This step protects against accidental electrical shock.
- Remove the faulty control knob by pulling it straight off the control shaft. Do not use excessive force, as this can damage the shaft.
- Inspect the control switch behind the knob for any signs of damage or wear. If the switch appears faulty, consider replacing it as well.
- To access the control switch, move the stove away from the wall and remove the rear panel. This step provides a clear view of the internal components.
- Align the new knob properly with the control shaft and push it into place. Ensure a secure fit to prevent slipping during use.
- Plug the appliance back in and test the burner. Confirm that the knob turns smoothly and that the burner responds accurately to adjustments.
- Clean the new knob and surrounding area to remove any installation debris.
Note: Always use manufacturer-approved replacement parts for the best fit and performance. If the knob or control switch does not function as expected, consult a qualified technician.
Routine care and prompt replacement of worn control knobs help maintain precise control over the gas burner. These steps support both safety and efficiency in any kitchen environment.
Replacing key gas burner parts delivers significant safety and efficiency gains.
- Modern components improve combustion efficiency, reduce emissions, and offer fuel savings up to 40%.
- Advanced features like oxygen trim controls and precise air-fuel management enhance operational safety and reliability.
Regular inspection and proactive maintenance allow early detection of issues, minimize downtime, and extend equipment life. Facilities that adopt preventive strategies report fewer outages and lower repair costs. Choosing quality, compatible gas burner replacement parts ensures optimal performance and long-term value.
FAQ
How often should users replace gas burner parts?
Most experts recommend inspecting gas burner parts every 12 months. Replacement depends on usage, but high-traffic kitchens may need new components sooner. Regular checks help prevent unexpected failures and maintain safety.
Can users install gas burner replacement parts themselves?
Many homeowners can replace simple parts like control knobs or burner heads. For gas valves, igniters, or thermocouples, a certified technician should handle installation. This approach ensures compliance with safety standards.
What signs indicate a gas burner part needs replacement?
Common signs include uneven flames, persistent clicking, gas odors, or visible damage. Users may also notice difficulty lighting the burner or inconsistent heat output. Immediate attention prevents safety hazards.
Are universal replacement parts as reliable as OEM parts?
Universal parts fit many models and offer convenience. OEM (Original Equipment Manufacturer) parts guarantee compatibility and performance. For critical components, OEM parts provide the highest reliability.
How can users ensure compatibility when buying replacement parts?
Users should check the appliance model number and part specifications. Manufacturers often provide compatibility charts. When in doubt, consult the user manual or contact customer support.
What maintenance tips extend the life of gas burner parts?
- Clean burner heads and igniters monthly.
- Inspect valves and thermocouples for corrosion.
- Replace worn control knobs promptly.
Regular maintenance reduces breakdowns and improves efficiency.
Do new gas burner parts improve energy efficiency?
Yes. Modern replacement parts often feature improved materials and designs. These upgrades enhance combustion, reduce emissions, and lower fuel consumption. Users benefit from safer and more efficient operation.
Post time: Aug-07-2025